Authentication
django는 우리가 바로 사용할 수 있는 인증시스템이 기본으로 있다.
로그인하면 django는 백엔드에서 세션을 생성하고 자동으로 쿠키도 준다. 매번 django 웹사이트를 방문할 때마다, 쿠키는 django로 가고, django는 쿠키를 읽어서 request.user에 user와 쿠키 정보를 함께 넣는다.
이런 기본 인증 시스템이 아닌 직접 커스텀 인증을 만들 수 있다. 이런 방법에는 토큰 인증, JWT인증 등이 있다.
Custom Authentication
#config/authentication.py

from rest_framework.authentication import BaseAuthentication
from rest_framework.exceptions import AuthenticationFailed
from users.models import User

class TrustMeBroAuthentication(BaseAuthentication):

    def authenticate(self, request): #여기 request에는 user가 없다. request의 header에서 유저를 찾아야한다. 유저를 못찾으면 None을 반환해야함.
        username = request.headers.get('Trust-me')
        if not username: #header에서 유저를 찾지 못했을 경우
            return None
        try:
            user = User.objects.get(username=username)
            return (user, None) #규칙임
        except User.DoesNotExist: #user목록에 로그인 요청한 user가 없을 경우
            raise AuthenticationFailed(f'No user {username}')
위의 코드처럼 우리만의 Authentication class를 생성한다. 마지막에 '(user,None)'만 반환해주면 된다.
Authentication class에서 반환하는 user가 바로 views에서 받게되는 request.user이다.
BaseAuthentication을 상속(확장)받은 모든 클래스는 'authenticate'라는 method를 override 해야한다.
#config/settings.py

REST_FRAMEWORK = {
    "DEFAULT_AUTHENTICATION_CLASSES": [
        "rest_framework.authentication.SessionAuthentication",
        "config.authentication.TrustMeBroAuthentication",
    ]
}
이후에는 이처럼 직접 만든 Authentication class를 인증 방식에 추가한다. 그러면 API request가 있을 때마다 views의 코드가 실행되기 전에 Authentication class를 자동으로 호출할 것이다.
Token Authentication
django rest_framework에는 이미 token authentication이 있다.
=> config/settings.py. THIRD_PARTY_APPS 아래에 'rest_framework.authtoken'을 추가한다.
-> admin 패널에 새로운 요소가 생길 것이다. 그래서 authtoken을 import하면 migration 파일도 생긴다.
-> 터미널에 'python manage.py migrate'를 해주어야한다.
#config/settings.py

REST_FRAMEWORK = {
    "DEFAULT_AUTHENTICATION_CLASSES": [
        ...
        "rest_framework.authentication.TokenAuthentication",
		...
    ]
}
#users/ urls.py
...
from rest_framework.authtoken.views import obtain_auth_token
urlpatterns = [
...
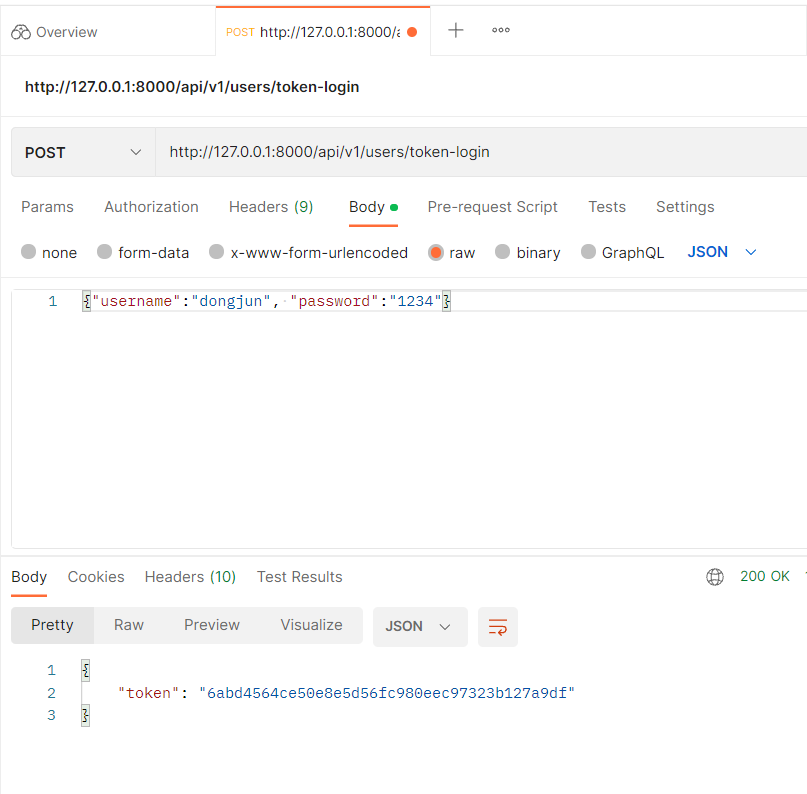
path("token-login",obtain_auth_token)
...
]obtain_auth_token은 username과 password를 보내면 token을 반환한다. 그러면, user에게 토큰을 주고, 그 토큰은 데이터 베이스에 저장된다. request가 있으면 Rest Framework는 token을 찾아서 request에게 user가 누군지 알려줄 것이다.

JSON WEB TOKEN (JWT)
①JSON WEB TOKEN (JWT) Encode
암호화된 정보(유저에 관한 정보)를 담고있는 토큰을 유저에게 준다. 유저는 그 토큰을 가지고 있다가 필요한 때 다시 준다. 유저가 토큰을 주면, django는 그 토큰을 열어서 정보를 확인한다. 그래서 데이터베이스에 아무 것도 저장할 필요가 없다. 데이터베이스의 공간을 차지하지 않는다.
JWT에는 강제 로그아웃 기능이 기본으로 있지 않다. 강제 로그아웃을 하고 싶다면, Auth Token이나 기본 세션/쿠키 인증을 사용하는게 좋다.
#users/urls.py
urlpatterns = [
...
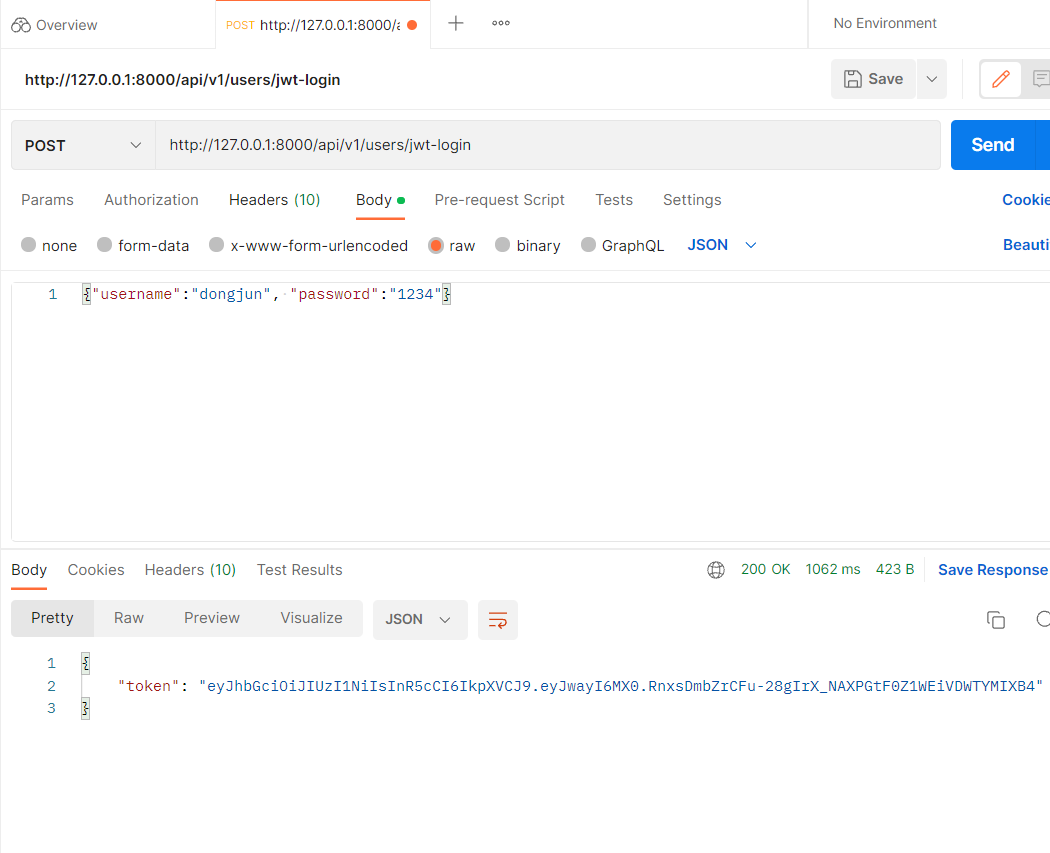
path("jwt-login", views.JWTLogIn.as_view()), #JWT Token
...
]#users/views.py
import jwt
class JWTLogIn(APIView):
def post(self, request):
username = request.data.get('username')
password = request.data.get('password')
if not username or not password:
raise ParseError
user = authenticate( #username과 password가 맞지 않으면 user를 리턴하지 않음.
request,
username=username,
password=password,
)
if user:
token = jwt.encode(
{"pk": user.pk}, #토큰에 이 정보를 포함.
settings.SECRET_KEY, #아무나 토큰에 담긴 정보를 볼 수 없도록 SECRET_KEY로 서명한다.
algorithm="HS256" #토큰을 암호화할 때 이 알고리즘을 쓰겠다.
)
return Response({"token": token})
else:
return Response({"error":"Wrong Password"})SECRET_KEY는 config/settings.py에서 볼 수 있다. 이것은 django가 유저에게 제공하는 쿠키나 세션에 서명할 때 사용하는 것이다. 그래서 이것은 다른 사람에게 공유되면 안된다.
token에 유저 정보를 담고 있기 때문에 이전 방식의 토큰보다 길이가 길다.
②JSON WEB TOKEN(JWT) Decode
#config/authentication.py

import jwt
from django.conf import settings

class JWTAuthentication(BaseAuthentication):

    def authenticate(self, request):
        token = request.headers.get('Jwt')
        if not token:
            return None
        decoded = jwt.decode(
            token,
            settings.SECRET_KEY, #복호화하는데 필요한 SECRET_KEY
            algorithms= ["HS256"], #Encode할 때 사용한 algorithm
            )
        pk = decoded.get('pk')
        if not pk:
            raise AuthenticationFailed("Invalid Token")
        try:
            user = User.objects.get(pk=pk)
            return (user,None)
        except User.DoesNotExist:
            raise AuthenticationFailed("User Not Found")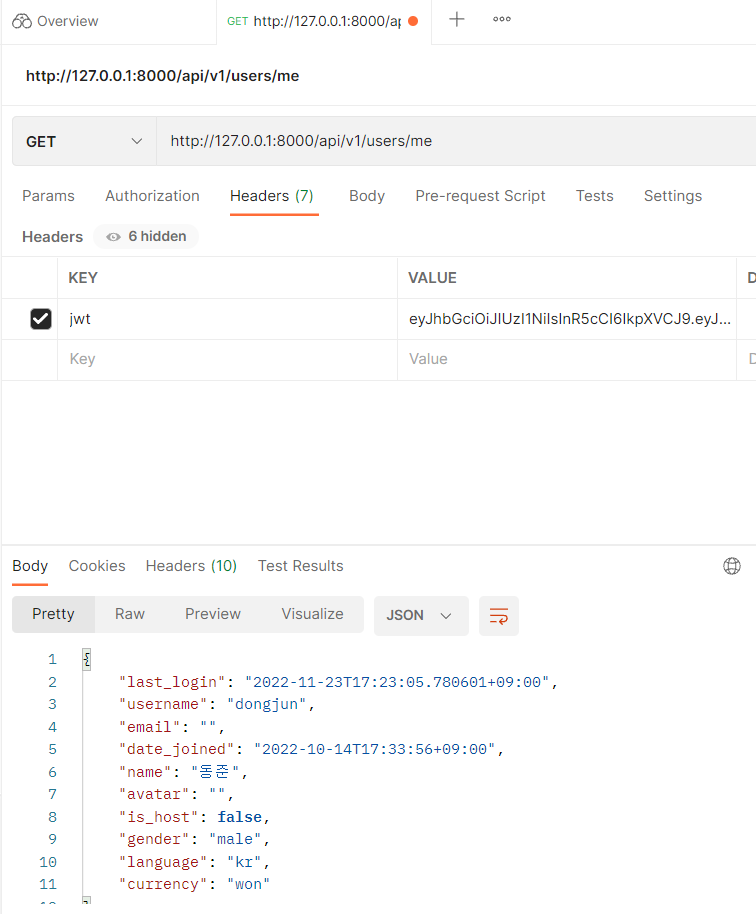
Environment Files
.env 파일을 만들어서, settings.py의 SECRET_KEY를 .env 파일 안에 붙여 넣는다.
-> 터미널에 'python add django-environ'을 입력해서 라이브러리를 설치한다.
->
#config/settings.py

import os
import environ

env = environ.Env()

BASE_DIR=Path(__file__).resolve().parent.parent

#environ.Env.read_env(경로)
environ.Env.read_env(os.path.join(BASE_DIR,".env"))

...

SECRET_KEY=env("SECRET_KEY")'노마드 코더 Airbnb 클론 코딩' 카테고리의 다른 글
| 노마드 코더 에어비앤비 클론 코딩 #16 API TESTING (0) | 2022.12.07 |
|---|---|
| 노마드 코더 에어비앤비 클론 코딩 #12 USERS API (0) | 2022.11.23 |
| 노마드 코더 에어비앤비 클론 코딩 #11 Rest API - 2 (1) | 2022.11.19 |
| 노마드 코더 에어비앤비 클론 코딩 #11 Rest API - 1 (0) | 2022.11.08 |
| 노마드 코더 에어비앤비 클론 코딩 #10 Django Rest Framework (1) | 2022.11.05 |